

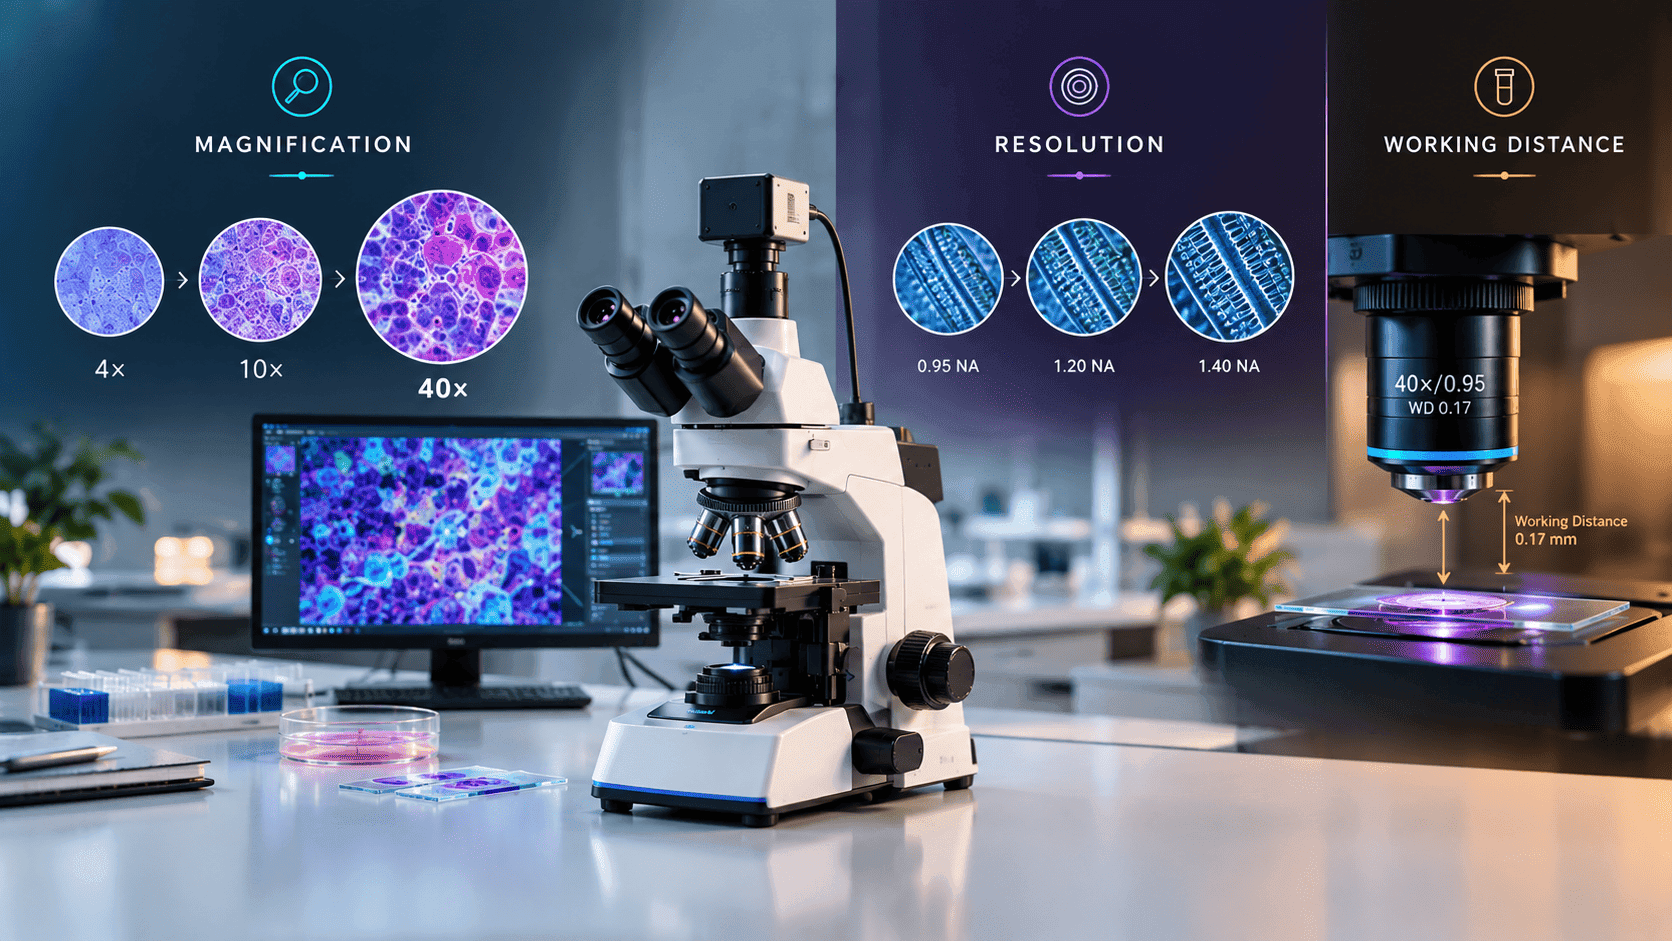
Choosing a microscope based only on its highest magnification can lead to the wrong instrument for a laboratory or research application. Magnification, resolution and working distance are three different optical specifications, and understanding how they interact is essential for selecting the right microscope objective.
Magnification determines how large a specimen appears. Resolution determines how much fine detail can actually be distinguished. Working distance describes the physical space between the objective and the specimen when the image is in focus.
For university laboratories, pharmaceutical research, biotechnology, microbiology, pathology and industrial inspection, these specifications influence image quality, sample handling, experimental flexibility and overall microscope performance.
Magnification: How Large Does the Specimen Appear?
Magnification is the degree to which a microscope enlarges the apparent size of a specimen.
A compound microscope generally produces magnification through the combination of an objective lens and an eyepiece.
The basic formula is:
Total Magnification = Objective Magnification × Eyepiece Magnification
For example, a 40× objective combined with a 10× eyepiece provides:
40× × 10× = 400× total magnification
Common combinations include:
Objective | Eyepiece | Total Magnification |
|---|---|---|
4× | 10× | 40× |
10× | 10× | 100× |
20× | 10× | 200× |
40× | 10× | 400× |
60× | 10× | 600× |
100× | 10× | 1000× |
However, a larger image does not necessarily mean a more detailed image.
Does Higher Magnification Mean Better Resolution?
No.
Magnification and resolution are related, but they are not the same thing.
Imagine two microscopic structures that are extremely close together. If the optical system cannot resolve them, they may appear as one blurred feature.
Increasing magnification can make that blurred feature larger, but it does not necessarily reveal the two individual structures.
This is often described as empty magnification—additional enlargement without meaningful additional detail.
Therefore:
More magnification ≠ more information
A good microscope should provide sufficient magnification to comfortably view the detail that its optical system can resolve.
What Is Microscope Resolution?
Resolution is the ability of a microscope to distinguish two closely spaced structures as separate objects.
Resolution is one of the most important indicators of optical performance.
For example, if two structures are positioned very close together, a microscope with sufficient resolution can display them separately:
● ●
An optical system with insufficient resolution may show:
●
The second system may still produce a highly magnified image, but the information contained in that image is limited.
Magnification vs Resolution
Specification | Meaning |
|---|---|
Magnification | How large the specimen appears |
Resolution | How finely separated structures can be distinguished |
Working distance | Physical space between objective and specimen |
These specifications should therefore be evaluated together.
What Determines Microscope Resolution?
Several factors influence microscope resolution:
Numerical aperture
Illumination wavelength
Objective quality
Condenser performance
Optical alignment
Contrast technique
Sample preparation
Optical aberration correction
Camera and imaging system
Environmental conditions
Among these, numerical aperture (NA) is particularly important when evaluating objective performance.
Numerical Aperture and Resolution
Numerical aperture describes an objective's ability to collect light from the specimen and is related to the angular range of light accepted by the optical system.
It is commonly expressed as:
NA = n × sin(θ)
where:
NA = numerical aperture
n = refractive index of the medium between the specimen and objective
θ = half-angle of the accepted light cone
A higher NA generally enables an objective to collect more light and resolve finer details, assuming other optical conditions are appropriate.
The Abbe Resolution Relationship
A commonly used approximation is:
d ≈ λ / 2NA
where:
d = minimum resolvable distance
λ = wavelength of illumination
NA = numerical aperture
The relationship illustrates why increasing NA can improve resolution.
It also explains why magnification should not be considered independently from objective specifications.
Why a 100× Objective Is Not Always Better Than a 40× Objective
A 100× objective provides greater magnification than a 40× objective, but that does not automatically make it the better choice.
A 40× objective may be more suitable when:
A larger field of view is required
The specimen contains larger structures
Easier focusing is preferred
The sample is difficult to position
A longer working distance is useful
A 100× objective may be appropriate when:
Very small structures must be resolved
High-resolution imaging is required
The specimen and preparation method support high-power observation
The application benefits from immersion optics
The objective should therefore be selected according to the smallest feature that needs to be observed, rather than the largest magnification number available.
Working Distance: The Space Between Objective and Specimen
Working distance (WD) is the approximate distance between the front of the objective and the specimen when the specimen is in focus.
Working distance varies significantly between objectives.
In general:
Lower magnification objectives tend to have longer working distances.
Higher magnification objectives often have shorter working distances.
High-NA objectives frequently require the objective to be positioned relatively close to the specimen.
Working distance is especially important when working with thick samples, live specimens, culture vessels or applications requiring manipulation around the specimen.
Why Working Distance Matters
A suitable working distance can make microscopy safer and easier.
A longer working distance can provide:
More room for sample manipulation
Easier specimen positioning
Lower risk of objective-to-sample contact
Greater flexibility for thicker samples
More space for specialized experimental accessories
A shorter working distance can accompany high optical performance, but it requires more precise positioning and focusing.
For routine slide-based microscopy, a short working distance may not create a major practical problem. For live-cell imaging or thick specimens, it can become a significant consideration.
How Magnification, Resolution and Working Distance Are Connected
These three specifications should not be evaluated independently.
Consider two objectives:
Feature | Objective A | Objective B |
|---|---|---|
Magnification | 20× | 60× |
Numerical Aperture | Moderate | Higher |
Working Distance | Longer | Shorter |
Field of View | Larger | Smaller |
Fine-detail capability | Moderate | Higher |
Objective B may be preferable for observing very small structures.
However, Objective A may be more practical for locating specimens, examining larger structures or working with samples that require additional physical space.
The "better" objective depends on the application.
Field of View and Magnification
As magnification increases, the visible field of view generally becomes smaller.
At low magnification, you can see a larger area of the specimen.
At high magnification, you see a smaller area but can examine finer structures.
This creates an important workflow:
Locate → Select → Magnify → Resolve → Analyze
For example, a microbiologist may initially use a low-power objective to locate a region of interest and then move to higher magnification for detailed examination.
Using the highest magnification from the beginning can make locating structures unnecessarily difficult.
Depth of Field and Magnification
Depth of field refers to the thickness range of the specimen that appears acceptably in focus.
Higher magnification and higher numerical aperture generally result in a shallower depth of field.
This means that high-power objectives can make focusing more demanding.
For relatively thick or three-dimensional specimens, only a narrow plane may be sharply focused at one time.
This is particularly relevant for:
Cell cultures
Tissue sections
Microorganisms
Thick biological samples
Material surfaces
Three-dimensional structures
Applications involving thick specimens may therefore benefit from objectives and imaging techniques designed specifically for those sample types.
Oil Immersion and High-Resolution Microscopy
Some high-magnification objectives use immersion media, most commonly immersion oil in conventional light microscopy.
The purpose is not simply to increase magnification.
Immersion oil can provide a refractive index closer to that of the objective's optical design and specimen interface, allowing the objective to collect light over a larger effective angular range.
This can increase numerical aperture and support higher resolution.
When Is an Oil-Immersion Objective Useful?
Oil immersion is commonly associated with applications requiring fine optical detail, including certain microbiology, histology and research microscopy workflows.
However, it introduces additional considerations:
Correct immersion medium must be used.
The objective must be cleaned properly.
The specimen preparation must be compatible.
Users need appropriate handling procedures.
Oil should not be allowed to contaminate unsuitable objectives or components.
Therefore, oil immersion should be selected because the application requires its optical advantages—not simply because 100× sounds more powerful.
Magnification in Digital Microscopy
Digital microscopes introduce another important distinction: optical magnification versus digital enlargement.
Optical magnification occurs through the microscope's optical system.
Digital enlargement occurs after the image has been captured and displayed or processed electronically.
Digital zoom can make an image appear larger, but it cannot recover detail that the optical system failed to resolve.
For example, if a camera captures insufficient information about a microscopic feature, increasing the image size in software will not create genuine optical resolution.
Therefore, when evaluating digital microscopes, consider:
Objective magnification
Numerical aperture
Camera sensor
Pixel size
Optical resolution
Field of view
Display resolution
Image-processing software
Camera Resolution Is Not the Same as Optical Resolution
A microscope may have a high-resolution camera, but the camera cannot compensate indefinitely for limitations in the microscope optics.
The imaging chain should be considered as a complete system:
Specimen → Objective → Optical Path → Camera → Software → Display
If the objective does not resolve a feature, a higher-resolution camera cannot simply recreate that missing information.
Similarly, an excellent objective can be limited by an inadequate camera or poorly configured imaging system.
For research microscopy, optical and digital components should therefore be matched.
How to Choose the Right Objective
Instead of asking:
"What is the highest magnification available?"
ask:
What is the specimen?
What is the smallest structure I need to distinguish?
What contrast method will I use?
Do I need live or fixed samples?
How thick is the specimen?
Do I need a large field of view?
How much working distance is required?
Will I use immersion optics?
Will images be captured digitally?
What level of quantitative analysis is required?
These questions provide a much better basis for objective selection.
Choosing Objectives for Different Applications
Microbiology
Microbiology applications may involve bacteria, fungi, parasites, stained specimens or live microorganisms.
Important considerations include:
High-resolution objectives for small structures
Appropriate contrast techniques
Numerical aperture
Oil immersion where applicable
Image documentation
Ease of cleaning and maintenance
For routine bacterial morphology, a high-power objective may be useful, but the appropriate contrast method and specimen preparation are equally important.
Pharmaceutical Research
Microscopy in pharmaceutical environments can involve:
Crystals
Powders
Particles
Formulations
Contamination
Raw materials
Drug delivery systems
The best microscope configuration depends on the specific analytical question.
For example, polarized-light microscopy can be valuable for examining certain crystalline or birefringent materials, while digital imaging can support documentation and measurement.
The highest magnification is not necessarily the most useful specification for particle or formulation analysis.
Biotechnology and Cell Biology
Biotechnology laboratories frequently examine cells, cultures, tissues and fluorescently labeled structures.
Depending on the application, important specifications may include:
Inverted microscope configuration
Phase contrast
Fluorescence
Appropriate working distance
Live-cell compatibility
Environmental control
Digital imaging
Image analysis
For live-cell work, working distance and specimen access can be particularly important because the sample may be contained in a culture dish, plate or chamber rather than on a conventional microscope slide.
University Teaching Laboratories
Teaching laboratories often need versatility, durability and ease of operation.
A practical objective set may include:
4×
10×
20×
40×
100× oil immersion where required
The exact configuration should depend on the curriculum.
For undergraduate teaching, it may be more valuable to have reliable optics, robust mechanics, comfortable ergonomics and easy maintenance than specialized research features that students will rarely use.
Common Mistakes When Comparing Microscope Specifications
1. Choosing the Highest Magnification
A 1000× microscope is not automatically better than a 400× microscope.
Resolution, contrast, numerical aperture and specimen requirements matter.
2. Confusing Magnification With Resolution
Magnification makes an image larger.
Resolution determines whether additional details can actually be distinguished.
3. Ignoring Working Distance
A high-performance objective with an extremely short working distance may be inconvenient for certain samples.
4. Ignoring Numerical Aperture
Two objectives with the same magnification can have different optical performance because their numerical apertures may differ.
5. Relying on Digital Zoom
Digital enlargement cannot substitute for optical resolution.
6. Ignoring the Sample
The objective should be matched to the specimen's thickness, preparation, refractive properties and imaging requirements.
7. Buying Features Instead of a Complete Workflow
A microscope should be evaluated as a complete system rather than as a list of specifications.
A Practical Magnification and Objective Selection Framework
A useful decision process is:
Step 1: Identify the Specimen
Determine whether you are examining:
Cells
Bacteria
Tissue
Crystals
Particles
Materials
Live specimens
Fixed specimens
Step 2: Identify the Smallest Feature
Determine the smallest structure or defect that needs to be distinguished.
This establishes the approximate resolution requirement.
Step 3: Select the Appropriate Contrast Method
Consider:
Brightfield
Phase contrast
Darkfield
Fluorescence
Polarized light
Differential interference contrast
Confocal imaging
The appropriate method depends on the specimen and scientific question.
Step 4: Select the Objective
Compare:
Magnification
Numerical aperture
Working distance
Correction type
Immersion requirements
Field of view
Step 5: Check the Imaging System
If images need to be captured, evaluate:
Camera
Sensor
Pixel size
Software
Measurement tools
Image storage
Analysis capabilities
Step 6: Consider Workflow and Maintenance
Evaluate:
Ergonomics
Cleaning requirements
Objective durability
Service availability
Replacement parts
Training
Total cost of ownership
Quick Comparison: Magnification vs Resolution vs Working Distance
Parameter | Magnification | Resolution | Working Distance |
|---|---|---|---|
Main purpose | Enlarges image | Reveals fine detail | Provides physical clearance |
Higher value means | Larger apparent image | Potentially finer detail | More space around specimen |
Directly determines detail? | No | Yes | No |
Important for sample handling? | Sometimes | Indirectly | Yes |
Important for objective selection? | Yes | Very important | Very important |
Can digital zoom replace it? | Partly for display | No | No |
What Matters More: Magnification or Resolution?
For most serious microscopy applications, resolution is more important than simply maximizing magnification.
Magnification is useful only when the optical system can provide enough resolved information for the observer or camera to see.
A sensible rule is:
First achieve the required resolution. Then use enough magnification to display that resolved detail comfortably.
This avoids empty magnification and helps create a more efficient imaging workflow.
How Working Distance Influences Objective Selection
Working distance becomes especially important when the specimen cannot be positioned immediately below the objective.
Longer working distances can be useful for:
Thick specimens
Culture vessels
Live-cell experiments
Industrial samples
Samples requiring manipulation
Specialized microscopy setups
Shorter working distances can support objectives with high numerical aperture, but they require greater precision.
Therefore, a laboratory should never evaluate an objective solely on magnification and NA without checking whether its working distance is compatible with the specimen.
Frequently Used Objective Magnifications
Although exact specifications vary between microscope manufacturers and objective designs, common objective magnifications include:
4× Objective
Useful for:
Specimen scanning
Locating regions of interest
Large structures
Overview imaging
10× Objective
Useful for:
General observation
Tissue and cellular structures
Initial examination
20× Objective
Provides a balance between field of view and detail.
It can be useful for:
Cell imaging
Histology
General research microscopy
Fluorescence applications
40× Objective
Commonly used for detailed biological observation.
It can provide substantially more detail while retaining a useful field of view.
60× Objective
Useful when higher detail is required and the sample supports the shorter working distance and narrower field of view.
100× Objective
Often selected for very fine detail, with oil-immersion versions commonly used when high numerical aperture and resolution are required.
The exact choice should always be based on the objective's complete optical specifications rather than magnification alone.
Final Takeaway
Microscope performance should never be judged by magnification alone.
Magnification tells you how large the specimen appears. Resolution tells you how much detail you can distinguish. Working distance tells you how much physical space you have between the objective and specimen.
The best microscope objective balances these characteristics with the specimen, contrast technique, imaging workflow and research objective.
For laboratory procurement, the correct approach is to identify the scientific question first, determine the required resolution, choose an appropriate optical configuration and then select the magnification and working distance that support the workflow.
A microscope with the right combination of magnification, numerical aperture, resolution, working distance, contrast and imaging capability will generally deliver far more useful results than one selected simply because it offers the highest magnification.